Sunday, October 31, 2010

Flourishes


October has been such an incredible month! While in some ways I'm relieved that it is coming to an end, in other ways, I am hugely disappointed.

Our church has sponsored a pumpkin patch for most of the month, so I am happy that today marks the end of pumpkin patch duty! My son and I worked as a team and have put in about 15 hours altogether. In the beginning I thought I'd pack some markers and images to take so that I could color while we were there, but early on I learned that it was just too windy and/or there were too many interruptions (a good thing since it was a fundraiser!) to get much stamping accomplished. Besides, it has been really fun to see the children's delight as they come to pick out their pumpkins, sometimes in their costumes...I have really enjoyed it. I must admit that there are lots of things I could do with 15 hours of time! ;)

Florida has seen little to no rain for this month, and the air is FULL of pollen...but THAT and our battle with allergies is a whole 'nother story!


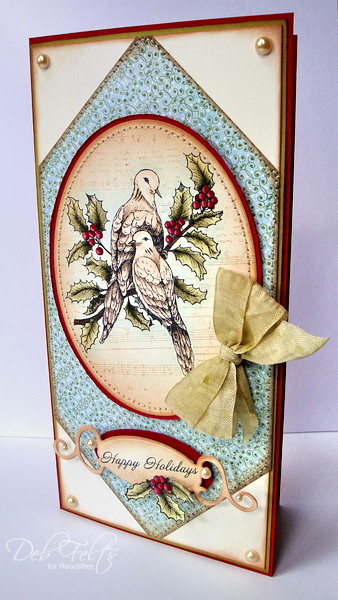
I have been so blessed to have been invited to spend the Sundays of October posting to the Flourishes blog as the Flourishes Limelight designer, and I am very sad to see that time come to an end. I loved the stamps, papers and ribbons they shared with me, and have fallen in love with cotton linen ribbon!  It has been so much fun to work with their intricate, elegant images...they are so very beautiful, and they definitely stretch my stamping skills.  Because some are realistic images of animals or flowers, I've had to research how they should be colored, adapting techniques and paying close attention to light and shadow. Julie also asked me to share some of my techniques, which really challenged me to scrutinize the way I stamp and try to identify little things I've discovered that make things work better or look more realistic. Some of the things one might take for granted are the very things that another stamper would love to find out about!

I hope you'll visit the Flourishes blog to read my final post there and learn about the two projects I've posted here as "teasers." You'll find tips and techniques, as well as links to the products I have used. I am hoping that something has inspired you or that you've learned something new to try! I'd love to hear what you think!

As busy as October has been, I'm sure, based on past experience, that November and December will prove to be just as hectic, each in their own way! Nevertheless, this is my favorite time of year to stamp, and I'm searching for a balance between real life and life in the stamping studio! 

Hoping to see you again soon! Happy Halloween, and blessings for the coming holidays!

Saturday, October 30, 2010

Happy Halloween!


I love this big ole spooky spider from the {stamps} of Life! Stephanie sent it to me quite a while back but it got tucked behind some other things until I came across it a couple of days ago.  In a way, it is kinda nice that it was outta sight, because it feels great to actually have something spooky to work on the night before Halloween.  Matthew is busy getting ready for the church youth group's costume party...I'll have to see if he'll let me post a picture!

For the card, I sponged pale yellow, apricot, orange, lavender, and black ink onto white card stock, then sprayed it with tattered angels spray and some smooth stray.  I love the misty, spooky way that this inking comes out!

I couldn't resist making a Halloween coaster while I was at it.  It doesn't get any easier than this...had to have some "atmosphere" for the picture, so I made a little cordial glass of kir.  It looks a little spooky, dontcha think?

Have fun this weekend!

Friday, October 29, 2010

Lizzie Anne Sale!


I was looking back through pictures of my cards and found a couple that I made a while back that had not been uploaded, so I'm sharing one with you today. This adorable sailboat from the August Mix, Turn Toward the Sun, is the perfect companion for October Afternoon's Seaside designer paper.  I used circle and scalloped circle nestabilities to cut and mat the layer for the image, which was stamped with various colors of ink, cut out and popped up on Zva foam dots to add dimension.  The anchor embellishment comes from June's mix, Life is Good.  I recycled a piece of rope from a Life is Good tag to knot through the double-ended tag sentiment and add to the nautical feel.  The sail is embellished with a few tiny red jewels and everything was aged with Tim Holtz tea-dye distress ink.

It was fun to keep this card really simple and just let the theme work for itself.  I hope you like it!

I hope you're looking forward to a fabulous weekend of family fun, trick-or-treating or just enjoying some beautiful Fall weather.  Lizzie Anne Designs is making your weekend EVEN MORE FUN by putting the ENTIRE STORE ON SALE 20% OFF! The sale is set to expire at midnight on October 31st. So get your orders in before then!

Wednesday, October 27, 2010

JustRite 12 Weeks of Christmas Blog Hop 8

Welcome to JustRite Stampers’ newest Wednesday feature, 12 Weeks of Christmas Blog Hops 8! Every Wednesday up until Thanksgiving some of your favorite designers will be joining some of the JustRite design team for a series of Christmas blog hops, showcasing JustRite’s entire Christmas Collection of stamps!  And don’t forget that JustRite has some Christmas stamps in their newly released CLING line of stamp sets -- you can find them HERE.  This week, the designers joining the JustRite design team are the Flower Soft and The Shabby Tea Room challenge blog design teams!  So mark your calendars for Wednesdays at 9am Central for great Christmas gift, card & project ideas, starting at the JustRite Inspiration blog!


I have always loved primitive folk art, especially at Christmas, and the colors for my card for today were inspired by the folk art look and the fun patchwork border in JustRite's set, Groovy Snowmen.

The snowman image was stamped with Memento Tuxedo Black ink on a circle of ivory card stock cut with a nestabilities die, then colored with Copic markers.  I stamped another image onto scrap card stock so I could color and cut an extra flower to adhere next to the greenery on his hat brim, which was embellished with a little bit of ultra fine pine Flower Soft.  There's also a teeny bit of ultra fine citrus crush at the flower's center.  Instead of catching a snowflake in his hand, this warm, handsome fella is holding a great big ivory Flower Soft snow ball, so you'd better duck!  ;)  He's ready to launch it!

The layout began with a scrap of Graphic 45 "The Night Before Christmas" designer paper adhered to a red card stock base.  I added a bit of sweater-textured red card stock created with a cuttlebug folder and white craft ink, and a sentiment from JustRite's Christmas Sentiments and Verses.  A strip of kraft card stock, a country blue satin bow, and a few button-trimmed ivory snowflakes punched with a Martha Stewart punch tie the whole design together.  Everything was inked with Tim Holtz tea-dye distress ink to give it that timeworn, warm country Christmas look.

I would have liked to stitch some of the edges of the paper, but didn't dare.  My sewing machine has not been working properly lately (puttputtputtzooom!)...it needs to make a trip to the repairman for a tuneup!  It is as old as the hills!  I'm almost afraid to take it in because I don't want him to tell me that it is now obsolete! 

Please visit these designers’ blogs to see what fabulous JustRite Christmas inspiration they have for you on the hop today!

JustRite Inspiration Blog

JustRite Design Team:

Sharon Harnist
Angela Barkhouse
Sankari Wegman
Stephanie Kraft
Kazan Clark
Michele Kovack
Kellie Fortin
Barb Schram
Debbie Olson
Becca Feeken
Heidi Blankenship

Flower Soft Design Team:


Jeanne Streiff
Debbie Seyer
Gini Cagle
Linda Beeson
Deb Felts
Cibele Glazer
Vicki Garrett
Dina Kowal
 
The Shabby Tea Room Design Team:


Debbie Marcinkiewicz
Nicole Segnere
Clare Buswell
Pattie Goldman
Lisa Golzbein
Cathy Clark-Sanite

Monday, October 25, 2010

From Our Home to Yours!


The deadline to finish holiday cards fast approaching...I cannot believe how fast October has flown by.  I know it is a bit hard to get in the Christmas spirit when Halloween and Thanksgiving are not even here yet, but if your household is like mine, finishing one holiday before starting to prepare for the next is simply not an option.  Life is just too hectic to wait.

Here's an easy card using the {stamps} of Life holly4Christmas that was inspired by this designer paper.  To me it looked like a pretty wallpaper print...the idea that I hope I was able to translate is that the greeting is coming from inside our home outside to yours.  I wanted it to look like a pretty wrapped package with a bow and tag.  I love this easy z-fold because it gives a simple card some quick pizazz.  This one would not be too difficult to mass produce, although it would require extra postage because of the grommet and ribbon.  I think it would be a great card to include with a hand-delivered gift for a special friend.

Sunday, October 24, 2010

More Flourishes and 7 Gypsies


I have really been enjoying my Flourishes stamps, both new and old!  I had intended to use a new floral for today's cards, but I couldn't get my mind off of this 7 gypsies paper!

I'm kinda hooked on these rolled flowers lately too!  They are so easy to make and add so much to a design...they look especially at home on this old-fashioned parlor style card.

My second card is more characteristic of my typical symmetrical style, something Julie mentioned when I first made my debut on the Flourishes blog.  I have dabbled in lots of crafts, and here I was inspired by the over-under of basketweaving to make a narrow frame for this beautiful floral image.


I hope you like both of my cards.  I have always loved the beautiful prints, textures, and florals of the Victorian era, and enjoy working with this style.  My post on the Flourishes blog goes into more detail about why I chose these products and the how-to's for what I did with them.  I'd love it if you'd visit them and let them know that I sent you!  I can hardly believe that my month in the Flourishes' Limelight is almost over!

Friday, October 22, 2010


Welcome to the GinaK Center Stage Spotlight Design Team's blog hop!  You should have arrived here from Cheri's!  If you're lost, or if you're jumping into the middle, be sure to start at Betty's so you won't miss anything!

This go-round we had a tough multiple criteria challenge:
  • clean and simple style with plenty of "white" space
  • only one layer (plus the card base)
  • one image
  • one sentiment
  • any number of embellishments, but ALL the SAME COLOR.
Sounds easy until you start working on it!  I can't tell you how many times I grabbed something and had to remind myself of the list and put it down!  In fact, I am hoping the challenge police won't buzz me for that patterned paper.  I thought since her apron was paper-pieced that it would count as a single layer!  Is it legal?

I stamped an image from Asela's set, Sew Pretty, with Memento ink onto ivory pure luxury card stock, then colored and shaded it with Copic markers before using a nestabilities die to cut and emboss a notch from the upper left corner (petite ovals small and large).   Using the next smaller die, I cut and embossed an oval for the sentiment, which was inked with markers directly to the stamp.  All of the edges of both pieces were distress inked to give them a vintage warmth.    I paper-pieced her apron and pocket with a scrap of designer paper, shading them with Copic markers to add some depth to the design.  The focal image was adhered with 1/16 inch foam tape, and the sentiment with 1/8 inch so that it is a little more prominent.  I used some scor-tape to adhere a scrap of lace to the kraft card base, then added various buttons tied in different ways with crochet cotton to finish the design.  I hope you like it!  

Next up for you is Giovana!  Her card is sure to be a feast for your eyes!

Thursday, October 21, 2010

ihp Birthday Bash Gift Card Challenge

Welcome to Day 3 of i {heart} papers' Birthday Bash!  If you missed the first two days of our celebration, be sure to visit Kate's blog post from Day 1 to catch up on all the festivities and bring yourself up to speed on opportunities to score discount coupons and free stuff!

Today I have the privilege of hosting our final challenge.  As the mom of a 16 year old son, I know the dilemma of purchasing a gift that is meaningful for the recipient versus giving cash so that they can pool gift resources and buy themselves something they really want.  I have found that a hand-made card with a gift card tucked inside is the perfect compromise...better than ever if the card can be spent anywhere!

My challenge is for you to make a card that makes a personalized presentation for a credit-card-style gift card.  There are all kinds of options available, and plenty of tutorials at your disposal to help you accomplish this task!  Just take a look at the gift card holder gallery at Splitcoaststampers.com, and then check out the project resources section to get your creative juices flowing.  There are several here too if you'd rather cut straight to the chase!

For my gift card holder, I started with a 4 1/4 x 11 1/2 inch piece of card stock scored it at 3 inches,  5 1/2 inches, then flipped and scored at 3 again...the folds, when scored, create a "w" configuration.  Apply glue to the very edges of one point of the w so that the bottom sticks together.  It is important to apply glue only to the very edges so that the inside will remain open to form a pocket for the gift card.  I used a word window punch and a round tab punch to create a shaped opening for mine.

The front and inside can be decorated any way you like.  The only important thing to consider is the closure.  It is easiest to adhere a length of ribbon to the front before adding the decorative top panel.

For my card, I used some scraps of SEI Moonrise designer paper and a matching metal filigree butterfly, a little lace, and some beautiful sheer gold ribbon.  The beaded oval frame is adorned with Zva Creative bling, and the oval die cut focal image is from one of Unity's store kits.  I used a copper spiral clip to lift the butterfly off the surface to a more realistic angle.  I kept the inside relatively simple, stamping a sentiment directly on the center section and adding designer paper to the inside of the front and back flaps.

Can't wait to see your submissions to my challenge!  You can upload your card to an online gallery (keyword IHPBB10GC) or to your blog, but be sure to come back to list your link here with Mr. Linky!

Wednesday, October 20, 2010

ihp Birthday Bash Sketch Challenge

It's Day 2 of the i {heart} papers Birthday Bash, and today Kate is hosting a sketch challenge.  I ended up making two cards for it...it is a very versatile sketch that works with lots of images, and I thought it would be fun to try it with different shapes for the focal image.  I hope you'll play along with us by making a card and uploading it to your blog or online gallery using keyword IHPBB10S.

Before I share my cards, I'd like to invite those of you who missed yesterday's Birthday Bash festivities to visit yesterday's post and join in the PARTY!  You don't want to miss the opportunity to see some absolutely amazing designs by our talented design team and friends, and to play our scavenger hunt that will give you a one-time-use 20% off coupon off of your ihp Birthday Bash purchase.  I won't go into  detail again...just take my word for it and read yesterday's post!  Don't miss it!  :)


My first card for today features a cute Our Craft Lounge penguin and some gorgeous Cosmo Cricket Mitten Weather paper.  Love these soft colors!  I softened them even more by sponging everything with distress ink.  I used an opaque white pen to add a few snowflakes to her hat, and cut apart a Zva swirlie to frame the sentiment.  The faux suede ribbon adds just a little bit of texture.


My second card also follows the sketch, although I moved the rectangular panel slightly to the side so that I could add a glamorous bow atop a strip of glimmer ribbon that hides the seam of the papers.  Isn't this Basic Grey Olivia paper just perfect for this image from Unity's Singing Souls?!  I used red and black markers directly to the stamp, then added some very faint pink shading with a pale red Copic marker.   The sentiment was stamped with white craft ink and embossed with silver EP...the decorative image at the end was stamped in the same manner as the focal image on white card stock (cut out  and adhered with foam tape) to add a pop of color.  The tip of the microphone is covered with silver Flower Soft, so this card also qualifies for the Flower Soft Sprinkle challenge, "Heavy Metal!"  It makes me laugh that in this case, that is has dual entendre.  I'm not much of a fan of heavy metal music, but this card works for me!  

Good luck with your ihp hopping, shopping, and sketch challenge crafting!  You could be the lucky one who wins a prize!

Lizzie Anne Design Team Challenge


It's challenge day for the Lizzie Anne Designs girls, and this month our challenge was to make a Christmas gift and matching card using single stamps and stamp sets we were assigned for the month. My assigned set is Christmas Magic, along with the single, Tall Snowman. Love both of these! They are reminiscent of the vintage Christmas images I used to use for tole painting before I became a totally addicted stamper!


When Santa visits our house he works very hard, and in appreciation we always leave him a plate of warm cookies with a glass of milk.  I thought it would be fun to make a jar of layered ingredients along with a card for my design team project...this will make it easy for my friends to whip up a batch of cookies for Santa on Christmas Eve (the baking instructions are on the back of the tag).  This particular recipe is made with yummy tropical trail mix...I think Santa is gonna LOVE it!  ;)


To make my gift set, I used the single, Tall Snowman, as well as a combination of images from Christmas Magic, and Love and Joy Labels.  These images and sentiments go so great with this fun Christmas paper (Basic Grey Eskimo Kisses) from last year.  I just LOVE this old-fashioned font for Christmas!  Everything was stamped with Memento ink and colored with Copic markers.  Santa's hat was given some Flower Soft Polar White fuzzy texture, and I couldn't resist adding Rudolph with his nose so bright to the layout!  I used the last little bit of olive green May Arts ribbon that I had...if I had had more I would have wrapped the jar band with it and made a big pouffy bow!  To be truthful, the bow on the top of the jar was originally on the card, but I had to move things around and substitute some buttons because I just didn't have enough ribbon to go around.  I'll be ordering more!


I hope you enjoy visiting the LAD blog and the blogs of all the Lizzie Anne girls and that you are inspired to start early for your holiday gift preparations.  I am hoping to get a head start myself!

Tuesday, October 19, 2010

ihp 2nd Birthday Bash!


Hello and welcome to the i {heart} papers 2nd Birthday Bash blog hop and scavenger hunt!  You should have arrived here from Charlene's.  If you're jumping into the middle (or if you're lost!) be sure to start at Kate's.  You don't want to miss a thing!

Today we’re celebrating two great years of IHP and are delighted to have some fabulous guest designers playing along with our talented design team members to bring some birthday paper-crafting inspiration your way!  Our design team and guests are revealing their creations for this month's design team challenge--to design the "Perfect Pair"--a birthday card and coordinating gift, tag or other presentation item.

We would love if you would join us in making a Perfect Pair of your own (upload to your blog or an online gallery with the keyword IHPBB10).  Be sure to post your link on Kate’s blog so we can see your project and enter your name in our challenge prize drawings.

In addition to today's design team challenge, we've got some fun celebrating in store for tomorrow and Thursday!  Don't worry - you won't have to hop every day!  Kate will be hosting a sketch challenge tomorrow on her blog, and I'll have another challenge for you on Thursday. Winners for each day will be randomly drawn from each day's entries, and everyone who plays along, either with the challenges and/or the scavenger hunt (more on that below) will be eligible for the grand prize drawing that will close the festivities on Friday.

Submitting your challenge projects is not the only way to win!  Tucked into the text of today's blog posts we've provided clues to an easy scavenger hunt (most have to do with our favorite products and tools or hobbies and interests we have) that we invite you to play as you hop.   When you find the answer, click the link to visit the store and collect "evidence" that is listed on that particular product’s page and email your complete list, in blog hop order, to Kate when you're finished.  You can take your time and stretch the hop over the three days of our Birthday Bash celebration...it's not a race, but like any other sale, the earlier you shop, the better the selection!  Deadline to submit your scavenger hunt entry is Friday morning, 3AM EST.

By participating in the scavenger hunt you'll receive an exclusive, one time use 20% off coupon code to use when you shop at i {heart} papers.  (This will be emailed to you after the Bash when your scavenger hunt entries are checked.)  You will also be entered for your chance to win the grand prize $50 gift certificate drawing on Friday.

ALL orders placed during the Bash (Oct 19-21) will receive a free goodie bag of surprise merchandise.  The more you spend, the bigger your goodie bag!

Also, there will be random drawings for additional prizes from our PaperCraft Planet group members, our mailing list (sign up on the right side of the homepage) and our fans on Facebook.  If you are on all three, then you’ve got triple the chances to win!

For my project, I made a birthday card and matching trinket box.  There are lots of Fall birthdays among our family and friends, so this gorgeous SEI Moonrise paper is a great choice (hint hint) for loved ones on my birthday list!   I just need to get better about actually mailing cards!  :rolleyes:


I love projects with interesting folds, especially when they're easy to make but elicit a "Wow!" from the recipient.  This little triangle box is super simple, absolutely adorable and just perfect for small special gifts like jewelry or even gourmet candy!  It uses one 6 x 6 inch piece of cardstock, scored in thirds tic-tac-toe style, at 2 and 4 inches, so its overall size is approximately two inches.  You can get a sense of scale in the picture where it sits aside its 5 1/2 inch companion card.

Here's how you score the rest of the diagonal lines...

You'll fold these in a series of mountain/valley folds that nestle together when closed (see the picture below).  If you'd like, you can decorate the center of the inside...for mine, I repeated the leaf image, and attached my gift, a beautiful gold amulet made from a real acorn from the Sallier oak, an historical oak tree in the city of Lake Charles, Louisiana, which is next to my small hometown, Westlake.  What a great place to grow up!  Love the Cajun culture (yummy food!) and the natural beauty there! 

For the flap closure, cut a 2 x 4 inch strip and score at 2 inches so that it makes two equal square halves.  Use i {stick} papers tape to firmly adhere one half of the panel to the back of the box.  Decorate the front as desired. To hold the box closed, use Basic Grey magnets or velcro.


Here are the products I used on my project:
Scor Buddy
Our Craft Lounge Shades of Fall stamp set
*SEI Moonrise designer paper*
Memento Tuxedo Black ink
Tim Holtz tea-dye distress ink
Copic markers
Copic clear spica pen
Nestabilities beaded oval, classic oval dies
Two-tone brown/cream satin ribbon
Zva Creative bling
Zva Creative dimensional dots
i {stick} papers tape

Basic Grey magnetic closure

Your next stop on the hop is Geny's!   There's a list of all of the participating designers on Kate's blog just in case you get lost along the way!  Have a great time, and be sure to come back to participate in Kate's challenge tomorrow and mine on Thursday!

Sunday, October 17, 2010

Gorgeous Leaves!


No, the leaves in Florida are not changing yet, but I'm still enjoying some leaves of gorgeous colors!  I am thrilled today to share two more cards with Flourishes' fabulous images!  Both were colored with Copic markers, following the same sketch using different prints from the same pack of 7 Gypsies paper.  LOVE these rich colors and the intricately detailed artwork.


Isn't it interesting how the colors really change the mood of the card?!  These papers were very fun to work with and challenged me to get out of my straight-lined, symmetrical habits and try something different!  Figs and Pomegranates and Falling Leaves are very beautiful stamp sets that are really wonderful for someone who loves to color.  :)

I would love to hear what you think, but I do hope you'll visit the Flourishes blog to view my post there and maybe even leave a little love there too!  I've included a little bit about why I chose these images, along with a few tips for coloring and designing.  While you're there, make sure to scroll down to take a peek at the new stamps for their holiday release...they're GORGEOUS!  My wish list keeps growing!  ;)

Blessed Sunday!

Saturday, October 16, 2010

i {heart} Candy Canes!


Here's another card made using a new set from the {stamps} of Life, Christmas2build.  Although I actually made it last week for the set's release, this card fits Kelly's Mini Virtual Stamp Night challenge, inspired by Cloud 9.  It was stamped with Memento ink, and colored with Copic markers.  I love all that clean, fresh, bright white space!  This is one of my favorite color schemes.  :)

Friday, October 15, 2010

Lizzie Anne Mix It Up Day!


Today is Mix-it-Up Day at Lizzie Anne Designs! That means that our design team members will be sneaking peeks at the mix which will soon be released, and customers who want to play along are sharing projects with mix sets they've purchased in months past.

My card uses a 2-step (or not!) teapot image from our upcoming mix, The Key to Happiness.  I thought that since green tea has become so popular, it would be fun to pair this image with some Kaiser Craft paper that has an Oriental design...I stamped the sentiment on one of the accompanying punch outs that comes with the paper.  I used nestabilities ovals and a label 10 die to frame the sentiment.

Notes:
Memento ink
Tim Holtz distress ink
Kaiser Craft paper and pearls
Nestabilities oval and labels 10 dies
reversible satin ribbon
jute thread
little floral button

OCL Sketch


Here's a card with today's OCL sketch, made for my sweetheart for his birthday on September 17th.  Back in his Navy days, we took a trip to France, so this image brings back lots of wonderful memories of special times together, just perfect to set the mood for celebrating his special day!

I love these Basic Grey Capella papers...I stamped the image from OCL's Vintage Traveler with Memento Rich Cocoa onto one of the textured solid designs, inked everything heavily with distress ink.  The keys are from another OCL set, Under Lock and Key.  For this sketch I couldn't help but put a giant crinkle crepe bow!  I know it's a little girlie for a masculine card, but it just looks so pretty!  Patrick was sweet about it and didn't seem to mind at all!

Visit the OCL blog for more information about playing the challenge and the chance to win a prize!  There's lots of inspiration there too!

Wednesday, October 13, 2010

Flower Soft Challenge and Hop!


Ready for a hop? How about a challenge too? 

This week’s challenge – Autumn Colors!

This week we’ll be giving away TWO prize packages! One prize package will be given away on the blog hop and another will be chosen among people who make a card using Flower Soft and post it in the Splitcoast Gallery using the keyword FSC07. Both prize winners will be chosen and announced on the Flower Soft blog on October 22nd. The winner of the Splitcoast Gallery challenge will have their card featured on the Flower Soft Blog on 22nd!!!

If you didn’t start at the beginning of the hop please go to the beginning at the Flower Soft Blog.

As you make your way through the hop make sure you comment on each and every post. There will be a prize winner chosen randomly among the blogs. The prizes (one set for Splitcoast players and one set for the blog hop!) :

  • Hedgerow Friends Toppers – Picking Up Leaves
  • Hedgerow Friends Sentiments
  • Ultra Fine Sage
  • Nut Brown Flower Soft
  • Autumn Flower Soft
  • Flower Soft Glue

For my card, I chose a sketch from 2Sketches4You and an image from JustRite's set, Autumn Blessings, which I stamped with Memento ink and colored with Copic markers.  I diecut and embossed the image with an oval nestabilities die, sponging the background with pale yellow and tea-dye distress inks before removing the die, finishing with some Autumn Flower Soft at the base of the pumpkins. 

These beautiful designer paper prints (Sugardrop and Blackbird) are both from Memory Box.  All of the edges were inked with distress ink.  To emphasize the edges of the horizontal panel I added some Flower Soft gold peel off stickers to the edges...so elegant!  The focal image was popped atop a fancy tags die embellished with bling, a shiny bow, and a couple of Petaloo gold-edged velvet leaves.

Want even more inspiration?  Do you like video tutorials? Make sure and visit  Flower Soft TV!

From here, you're hopping to Vicki's!  I absolutely adore Vicki's work, and can't wait to see what she's got in store for us!

Tuesday, October 12, 2010

Santa's Magic Button


Here's a combo challenge card using "Santa's button" that my SIL Pam gave me for Christmas last year! I've been waiting for just the right image/sentiment with which to pair it...today's SCS color challenge (pink, red, and pear) and this week's Lizzie Anne sketch provided what seemed like the right opportunity.  It also qualifies for Lydia's Pink Holidays Hope You Can Cling To challenge. 

The Lizzie Anne Designs Christmas Magic sentiment was inked with markers directly to rubber, stamped on ivory card stock, cut out with an oval nestibilities die, and distress-inked with tattered rose ink before the die was removed.  I used several left-over Zva Creative clear rhinestone swirls that I colored with a pale olive Copic marker, along with a scrap of lace, some recycled flannel ribbon and more tulle (I've been on a tulle kick the last couple of days).

What do you think?  The button is a bit heavy but I still think the card came out kinda cute! Those swirls make me think of Rudolph's antlers!  ;)

Monday, October 11, 2010

Special Sets Release!


It's time for another special sets release from The {stamps} of Life, and this one includes some fun Christmas images as well as two other sets you'll use year-round.  Christmas2build features adorable mittens, stockings, trees and Christmas greetings.  Monogram2build and alpha4monogram combine to make lovely monograms for all kinds of occasions. Our design team has filled this special release gallery with all kinds of fabulous things!

Everybody's got laundry, even Santa and his Mrs.!  I thought it would be fun to make a card with Santa's stockings hanging on the clothesline! They're paper-pieced from Jolly by Golly papers, clipped with tiny clothespins, with scallop-circle-sponged clouds in the background.  The greeting is edged with Copic-colored holly leaves from this month's club set, holly4Christmas.  Kinda fun, don't you think? 

I hope you're enjoying this Columbus Day holiday!  For all of you, including those of you who still have to report to work today (especially you SAHMs who work EVERY day!), Happy Monday!

Sunday, October 10, 2010

Flourishes "In the Limelight"


I am so very excited to make my first post as Flourishes' October "In the Limelight" designer!  This card is one of two that I made to share on the Flourishes blog for today, both using the recently released set, Windows to the World.  I hope you'll visit so you can take a peek at my other card and maybe do a little shopping in the store while you're there!  Be sure to tell 'em Deb sent you!  ;)

Have a blessed Sunday!

Friday, October 8, 2010

CSS Blog Hop!


I canNOT tell you how honored, thrilled and beyond excited I am that the GinaK Designs CenterStage Spotlight design team is using one of my earlier cards as a sketch for this weekend's blog hop! Yipppeeee! I can't WAIT to see what they've done with my layout! The CSS team continually wows me...it is such a pleasure to call them my friends and always an honor to be among them, but especially so this weekend!

You should have arrived here from Cheri's...if you're jumping into the middle, make sure to catch the beginning by heading to Carla's!

Just call me Last Minute Lizzie for this one! Usually I have my card done at least the day before (yep, that's still LML by most standards!) but I just finished this one this afternoon! Things worked out great though! I was planning to take Asela's set, Sew Pretty, with me for our stamping outing this morning (Latisha joined us too), but as I was sorting sets and packing ink, I accidentally laid it aside and left it at home.  Asela offered to share her new set so I picked it up on the way home and hurried up to the studio to ink it up right away! Whew! I don't like being this close to the deadline, but how fun to get to use a brand new image!

Love love LOVE Asela's new set, Winter Wings! Isn't this blue jay just beautiful?!  My coloring is a shameless CASE of hers (with permission!), although I'm not the Copic master that she is! I made a mask and overstamped Nina's music from last Christmas (another favorite) using stamped-off Ranger tea dye ink...it came out a little warmer than the rest of the papers I intended to use, so I sponged everything to try to tie the design together. It looked like a better match until I walked outside into natural light to take the picture! I think I probably could have been a little heavier-handed with the distress ink on the designer paper...it actually matches better IRL!

AND...ugh!  I realized at about 8:30 (when it was pitch dark) that I didn't color this sweet songbird's beak!  So just pretend it's orange, ok?!  I'll have to fix that and take a new picture in the morning!

Notes:
Asela's set, Winter Wings
Nina's set, Vintage Borders
Melissa Frances' Home for the Holidays 6 x 6 designer paper pad
Graphic 45 Christmas Past "The Night Before Christmas" (dots) designer paper
GinaK Pure Luxury card stock (ivory, tan leather, soft sand)
Copic markers, white color pencilstumps and gamsol
MS snowflake punches
Creative Imaginations dark red glass brads
burgundy satin ribbon

Giovana always amazes me with her gorgeous designs, and I'm sure she'll have something for you that will knock your socks off! Her blog is next! Enjoy the hop!

OCL Sketch!

TGIF, right?!  It has been a busy week and I'm ready for the weekend to start early!  I am meeting Asela and Latisha this morning to stamp at the LSS, and hopefully we're gonna get to have lunch with  Copic's Colleen Schaan.

Friday means there's a new sketch on the OCL blog.  My card is a fun Halloween card with Little Boogas and some more SEI Spooks designer paper.  LOVE the little bit of metallic in this paper!  How fun is that silver bow and all that bling!?  This slightly askew layout was really great to work with.  I actually had to piece the orange background, and that diagonal strip covered the seam very nicely.

Notes:
Our Craft Lounge Little Boogas
Memento ink
Copic markers
Spica glitter pen
Eyeliner Black and Real Juicy Orange Sparkly Fluff
Silver satin
Joy Ride button
bling

Be sure to visit the OCL blog for all the details on rules and prizes for playing along with the sketch!

Hope You Can Cling To!


Have you seen the October challenges that are being posted on this special forum at SCS?  Having done an internship at M.D. Anderson Hospital in Houston as a young about-to-graduate physical therapist (way back in the early 80's!), and with a friend currently recovering from surgery for breast cancer, this is definitely a cause I can embrace.  I haven't gotten to play many so far, but I'd like to try to play a bunch more!

Here's a retro design using an image from Lizzie Anne Designs' In the Powder Room, made for Lori's Bring in the Brown challenge.  This image just makes me smile.  I stamped it with Memento Rich Cocoa ink, colored it with Copics, sponged the edges with distress ink, and brought in more brown with a scalloped circle mat.  The Creative Imaginations designer paper was a recent purchase from the LSS that turned out to be just perfect for this challenge.  I added a fancy tags sentiment, some pearls, a sheer ribbon bow with a button-tied Tim Holtz flower made using a tattered florals Sizzix die cut from some linen that used to be my husband's shirt!  When he threw it out, I confiscated it!  I have used scraps from it in quite a few projects!  It was no longer fit to wear, but it is still great for crafting! ;)


My second card is a Skipping Stones Design card for Beate's Lingerie Inspired challenge.  I absolutely adore SSD's bra sets, and they're just perfect for a challenge like this.  Their witty humor is so fun!  The bra is from one set, the hanger from the other.  I used some designer paper given to me by my friend Kim...the swirly print of the paper that the bra was pieced from reminded me of  the lacy, feminine fabric that bras are often made of.  The white embossing, satin ribbon, velvet trim, lacy edges, and pearl were all lingerie inspired.

Thursday, October 7, 2010

Flourishes and Flower Soft


Since October has arrived and it's Breast Cancer Awareness month, this week's Flower Soft Sprinkle Challenge is to use pink. I decided to combine the challenge with Flourishes' Timeless Tuesday sketch.  The image I chose is a beautiful watering can floral from the set, Summer on the Patio, stamped on Flourishes Classic Ivory card stock, embellished with Flower Soft and a rich deep rose silk bow.  I had to change the circle in the sketch to an oval to accommodate the height of the image, but hopefully the sketch is still recognizable.

Notes:
Memento ink, Tim Holtz distress ink, Copic markers
Nestabilities oval, scalloped oval, labels 4 and 10
scraps of DCWV and BG designer paper
Sweet Pea Flower Soft
MS border punch, ticket corner punch
Kaiser pearls
vintage brads

Yesterday was our 26th wedding anniversary, and that's why I chose the "Celebrate" sentiment!  Now I can officially say that I've been married for half of my life!  ;)  I would definitely say that THAT is something WORTH celebrating!

Tuesday, October 5, 2010

A Warm Welcome!


Exciting news from Lizzie Anne Designs today! We are welcoming two new design team members! YAY! Congratulations to Anya Schrier and Pam Hornschu!  So thrilled to be working alongside two more extremely talented stampers!  The whole LAD team ROCKS!  Can't wait to see what you do with Lizzie Anne's wonderful images!

My card for today features a spooky skull from the Sweet and Spooky mix.  I found some cool Pinecone Press designer paper that had a bit of almost neon green that inspired me to grab a couple of fluorescent Copic markers to give this image an eerie glow.  I layered some Papertrey card stock to emphasize the eerie hues and kept the layout ultra simple since the paper was pretty busy.  I think it turned out kinda FUN!

Welcome, again, to Anya and Pam!  So happy to have you!

Monday, October 4, 2010

Holly4Christmas!


Here are a couple of cards made for the recent release from The {stamps} of Life.  This new set, Holly4Christmas, has some great traditional images in it (along with some fun sentiments I'll share later), and I just love how they look with this Basic Grey Jovial designer paper!  The rich colors are so gorgeous, especially when paired with some shiny deep burgundy satin or sparkly gold!


The other really cool thing about Stephanie's stamps is how they coordinate with each other.  I really appreciate the planning and forethought that it takes to make things so interchangeable!  I used the new set's swirly patterned ornament with the background pattern from swirls2build...don't they look pretty together?!

I love simple cards that turn out elegant without huge effort!  Just perfect when you're mass-producing!

Sunday, October 3, 2010

In the Limelight!


I can't tell you how excited I am to finally share the news that I'm "In the Limelight" at Flourishes!  From my earliest stamping days when I had just discovered Splitcoaststampers, I fell in love with these gorgeous, elegant images, and was in awe of the talented girls on the Flourishes' Design Team.  It was as a brand new Dirty Girl that I first got a few of my own Flourishes stamps to play with, and since I'm a sentimental girl, I thought I'd share a few of those projects with you.

The theme of that first Dirty Dozen Gallery was "In the Beginning" and this sweet rock-a-bye door hanger was (and still is) one of my favorite projects.  I love this adorable image, and was tickled pink that this was the "teaser" on the SCS home page for the gallery my first month.

I had the pleasure of meeting Jan Marie and many of the Flourishes Designers when I went for my Copic certification.  It was Mardi Gras season, and Jan Marie opened her home one evening to share some amazing Cajun delicacies with a group of stampers who had attended the Flourishes weekend event and those attending the Copic training next morning.  Being from Louisiana, that was certainly right up my alley!  YUM!

I have to smile as I remember that weekend, because I was sneezing every other breath and probably should not even have been there, but I did not want to miss becoming certified...I tried to stay kinda "quarantined" and I'm sure everyone wanted to avoid me like the plague, but they were all very gracious and wonderful and it ended up being a fabulous weekend and the start of many amazing friendships.

From the name of my blog you can tell that I love music, and so I just HAD to have the Flourishes Christmas music stamp.  This card, for the "In Touch With Textures" theme, my last month with the Dirty Dozen, features that stamp along with a texture paste/brass template Christmas horn.  I love how glittery and elegant this card turned out to be with the gold against the rich hunter green faux suede paper.  The music makes the perfect elegant backdrop...it is that elegance and beauty that draws me to Flourishes' images.

I am so thrilled and honored to be invited to spend the month of October in the limelight...Sundays are always special but this will  make them even moreso!