Hi everyone! A few weeks ago one of my readers asked for instructions on making a window card so I'm back with another one, this time with traditional Christmas colors and imagery. These are really simple to make, and can be left simple or fancied up depending on the occasion. They are also a good way to create an interesting yet relatively flat card for mailing when made without bows, flowers, enamel dots and other bulky embellishments.

This card starts with a standard 8 1/2 x 11 inch piece of card stock cut in half vertically and folded to create a 4 1/4 x 5 1/2 inch card front.
The window, using the larger of two coordinating dies, is first cut into a 4 x 5 1/4 inch piece of designer paper. After adhering the designer paper to the card front, it is easy to then position the smaller die within the negative space and run the open card back through the die machine to make the actual opening that allows the inside of the card to peek through. What a fun "teaser."
Adhere another piece of 4 x 5 1/4 inch card stock to the inside, close the card, and stamp the image or quote to properly position it within the window. It helps, especially with solid stamps, to use a platform so that the stamp can be repetitively inked and stamped to get adequate coverage. One advantage of the Tim Holtz platform is that one of its edges is open...even if you've already completed your card front, you can position it off of the edge of the platform to stamp the inside.

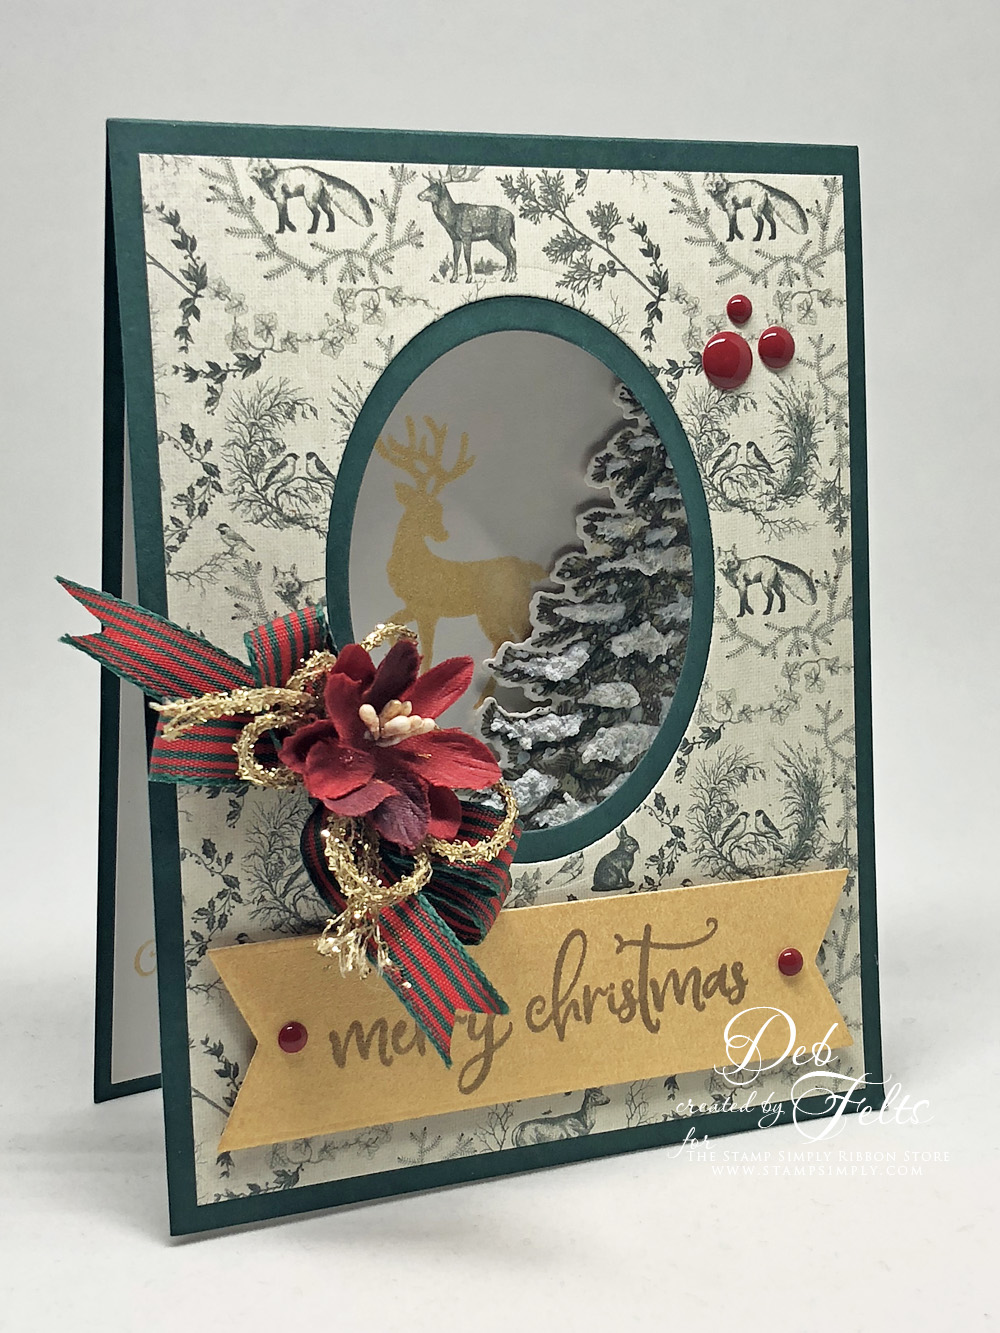
Here's a full view of what is peeking through from the inside. I included a die cut tree and sentiment, which adds a bit more dimension and interest for both the "peek" and the full reveal, especially with shimmery ink and some textural snow.
Today's version of the window card uses coordinating dies and the contrasting colors of the designer paper and card stock to create a simple border. Another option as seen here, is to die cut a fancy die shape, and then use a smaller basic shaped die (the same size as the one used to cut the actual opening on the card front) in its center. This creates an actual frame that can be layered directly onto the card front, with a stamped image or designer paper tag peeking through. It's especially fun because in this case the window design is not quite as obvious until the moment the card is opened.
I hope you have fun playing around with coordinating dies in graduated sizes and varying shapes to make some window cards of your own.
Here's what I used for today's card, all from Stamp Simply:
- Stamp Simply Clear Stamps - Combo/Stamp/Die Christmas Trees
- Stamp Simply Clear Stamps - Farmhouse Christmas
- Authentique Solitude 6x6
- Delicata Non-Tarnishing Ink Pad - Golden Glitz
- Memento Full Size Dye Ink Pad - Rich Cocoa
- Luxury Pearlescent Metallic 105# Cardstock - Gold 6 ct
- Petaloo Botanica Baby Blooms - Red
- 3/8" Grosgrain Stripes - 3 yard Bundle
- May Arts Metallic String Ribbon - 5 yard Bundle
- Stamp Simply Steel Dies - Fishtail Sentiment Banners
- Spellbinders Die - Classic Ovals Small SM
- Spellbinders Die - Classic Ovals Large LG
- DecoArt Snow-Tex
- Tombow Mono Multi Liquid Glue
- Scrapbook Adhesives-3L 3D Self-adhesive Foam Squares - Mix
- Simple Stories Enamel Dots - Cozy Christmas


No comments:
Post a Comment